Usually, when we buy a kayak we don’t speculate how to transporting kayaks. If your house is near the lake or water spots, then you are lucky enough. But what about those whose houses are not?
Tieing the kayak with foam blocks for kayak transport can make your transportation easy and simple without the help of a roof rack. Moreover, you can use foam blocks for kayak storage. You may expect to understand how to tie down a kayak with foam blocks or how to use foam block kayak carrier. We are going to support you to get it done. All you have to do is interpret the instructions we provide.
These steps will skillfully prepare you to understand the facts and forget to see the warning part to avoid any accidents. Let’s catch the stages then and also learn how to transport a kayak.
How To Tie Down A Kayak With Foam Blocks Without Roof Rack
Make your trips memorable by kayaking through discovering how to tie down a kayak with foam blocks. For your benefits and convenience just collect or order the equipment first.
| Pieces Of Equipment We Need | Reason To Buy |
| Two foam blocks- Seattle Sports RS – 18″ Universal Kayak Block | Key Features: 1. No-Skid anti-slipping bottom 2. Easy to use 3. Excellent product is known as best foam block kayak carrier Available On Amazon |
| Four straps- US Cargo Control E Track Cam Buckle Strap | Key Features: 1. Easy to use 2. Versatile 3. Built to last Available On Amazon |
| Two Y-straps- German WWII Black Leather Y Straps | Key Features: 1. Fully Adjustable 2. Sturdy metal buckles and loops 3. High-Quality Leather construction Available On Amazon |
Step 1: Place The Foam Blocks
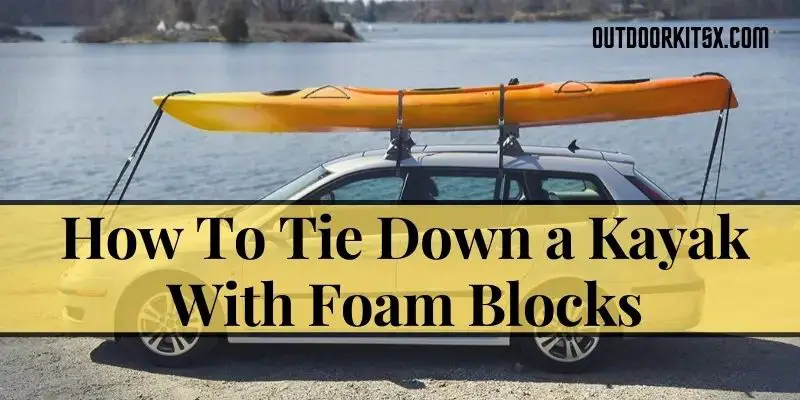
Attach the kayak foam blocks for roof rack or without the roof rack and kayak straps to place them on the roof of the car. One block will be behind the windshield at the front and the second one will be before the windshield but straight at the back.
Step 2: Secure The Foam Blocks
For securing the foam blocks, take the straps on two sides which are attached to the blocks from both of the car doors. In the car, tight the loose end with the buckle end jointly. Repeat it for the second block as well.
Step 3: Lift The Kayak On The Roof
Carefully lift the kayak on your own or with the help of a friend. Locate it in the center of the roof.
Step 4: Throw The Strap Over The Kayak And Car
After placing the kayak in the center, throw the loose end of the strap over the car and kayak at the back door. Repeat it for the second strap at the front door.
Step 5: Secure The Straps
To secure the straps, you need to go safely in the car, pull the loose end, and attach it to the buckle end. Try to tighten it enough to place the kayak comfortably.
Step 6: Install The Y-straps
Take the single hook part of the strap to put it onto your kayak grip. In the front of your car find two solid metal areas to connect the two lasting hooks. Repeat the process on the backside also.
Step 7: Secure All The Rest Of The Straps
Lastly, secure every strap which has the rest of the opening of the part. You can roll them to the buckle straps or either knot can be the solution.
Step 8: Shake The Kayak
Shake the kayak, in the end, to see whether it is moving or not. If it is moving then check the straps again and pull them to tighten the straps.
Warnings
Consider this part as a warning or precaution. Before and after the preparation, these aspects will help you to be comfortable along with the protection throughout the journey.
- Don’t place the foam blocks in the glass while placing it.
- Make sure the bow side is in front of the car.
- Don’t formulate the straps criss-cross otherwise, it won’t give you the right result.
- Don’t throw the buckle end instead of a loose end. It can break the windows.
- Position the buckle end on the passenger side of the car so that you can adjust the straps easily in the middle of the road by avoiding the traffic.
- To avoid the vibration and other sounds, close the straps neither tight nor loose. Over tighten straps can dent your car.
- Check the straps after a few kilometers of driving.
Check it out on youtube too
Frequently Asked Questions(FAQs)
Can we use a ratchet strap instead of a buckle strap?
What if I lift the kayak and the foam buckles will displace?
Is it possible and safe to get kayaks on the roof of the car for a long-distance journey?
Wrap Up
It is not an easy job to move a heavy and large kayak here and there frequently. But sometimes what’s the point if we can’t carry the thing which we like the most. That is the only reason to bring this content for you.
Without spoiling your mood on your vacation you can carry kayak with you. We hope that by learning how to tie down a kayak with foam blocks, you will enjoy your time happily. Plus, you will be glad to see the precaution portion of the content.
- How To Tie Down A Kayak With Foam Blocks Easily
- How to Put a Kayak on a Subaru Outback With Skillful Steps
- How To Ratchet Strap Kayak
- 7 Best Whitewater Kayaking Shoe – Which One to Pick For Comfortable Longtime Kayaking
- 7 Best Whitewater Kayak For Big Guys To Enjoy Adventures
- 5 Best Kayak Fish Finder Under $200 That Are Worth The Price
- Know the 7 Best Nose Clips for Kayaking of 2021
- Best Sit on Top Kayak for Big Guys – Top 5 picks