Do you love exploration in the water? Do you like to get new charm at the heart of marine? If you do, this artifact is definitely for you. Here you will get a complete guideline for how to install temperature gauge on mercury outboard.
Mercury Marine technology carries on its expansion of outboard and marine motor equipment. The setting of the temperature gauge in the Marine outboard intensifies the amusement and security of the water drive.
In any temperature and measurement settings is necessary. Temperature gauges manage on the bimetal, gas-rooted, or growth principle. This device can measure temperatures between -200 … +700 °C. All tools are also appropriate for setting up in thermos wells.
So, let’s see what that excellent means of installing a temperature gauge.
How To Install Temperature Gauge On Mercury Outboard
Before starting the writing on how to install temperature gauge on mercury outboard, let’s have the idea of temperature gauge and mercury outboard in brief.
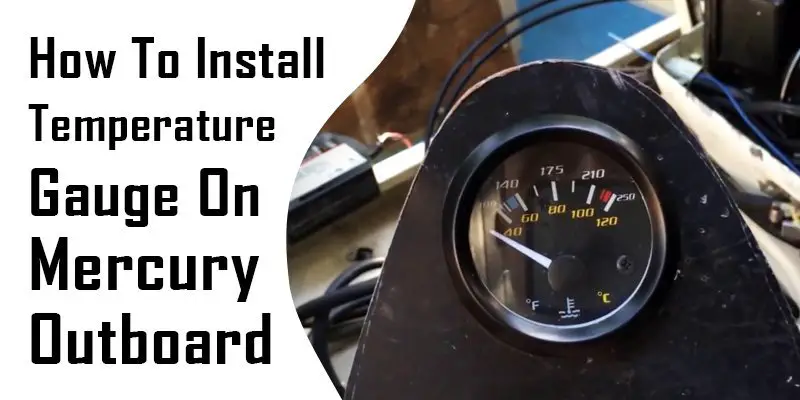
A temperature gauge is a means used to show the temperature of a thing being supervised. The display of temperature gauge can be the analog dial, the analog range, or a digital figure. The Temp gauge is entirely own wiring.
Mercury is carrying out marine technology with boating modernizations. Mercury outboards are constructed to move the distance, conveying renowned enactment compelled by onward-thinking technology.

 Sierra Outboard Water Pressure Kit

- Easy to install
- Nice looking outboard temp gauge kit
- Works great
Step 1: Matching Of Temperature Gauge And Sender
When you buy the temp gauge, it can be added to any engine. But ensure that the temp gauge and the sender of the mercury outboard should be matched. For the water temp gauge, you need screws into docks in the water jacket.
Make sure that the jacket is approved for marine use.
Step 2: The Taking Of Separate Wire
Firstly we will ensure to use shipwrecked, separated wire. It must not be lighter than 18 AWG. It is suggested to take separated wire terminals instead of ring type, and take all connections to the gauge. Without lighting, this needs 1/4” female blade terminals.
Step 3: Adjacent Of Top Of The Engine With The Cylinder Head
Take out one head bolt from the outboard, adjacent to the top of the engine. Now, keep the head bolt via a hovel in transferring the unit top on the cylinder head.
The main body of the sender element should be level in contrary to the cylinder head to provide accurate understandings. After that, Substitute head bolt and torque to endorse foot-pounds.
Step 4: Making A Hole In Mercury Outboard
In this step, we need to Cut a 2 1/16” diameter hole in the outboard and let stand the gauge with the supplied back lock.
Step 5: The Joining Of Wire
Here, Join the cable to the gauge knob marked “S” (signal) and fix it with a nut and lock washer. After that, again, join the opposite end to the knob on the mercury outboard temperature sending unit where the push-on terminal given.
Step 6: Connection Of Wire With ‘I.’
Then join the cable to the gauge knob marked “I” (ignition). And we must fix it with a nut and lock washer. Again enter the opposite end to a 12VDC circuit, which is initiated by the ignition switch.
Step 7: Settings Of The Electrical Base With The ‘G’ Part
In this phase, we must make sure of the joining of the temp gauge to the ground ‘G’ and with the mercury outboard by wire and nut. For a firm setting, you need to join the opposite end of the boat’s electrical base.
Usually, it is available in numerous locations at or nearby the instrument sheet. Yes, gradually, we are very close to our final installation work.
Step 8: Final Touch- Attachment Of Blade Terminal
In the last phase, you will attach the blade terminal near the twist-out light, in association with the positive “+” side of the instrument lighting circuit. Don’t worry; no individual ground is required for set alight. Here, your efforts will be paid off by reconnecting the battery.
Cautioun During Installation
- During installation, disconnect the battery.
- You need to retain the standard mercury outboard temperature sensor location and mercury outboard temp gauge wiring
carefully. - We must tighten up nuts on the back clamp.
- Six-inch pounds of spin is enough.
- Pull the bulbs straight out of the assembly.
- Check the temperature; do not use a temp gauge on air-cooled engines.
- When we will change the light bulb, do it by rotating the black socket in one-eighth, turn it in counter-clockwise mode until it comes out.
Why Is Temperature Gauge Necessary On Mercury Outboard?
Whether your boat or kayak is old or new gauge is essential in any way. Temperature gauges are your first line of resistance against all odd and costly engine cares. They will also help you prolong the existence of your engine, develop engine speed, and have a better fuel economy.
An oil temperature gauge is similar to a thermometer for a doctor — any vacillation from the rule is the reason for concern. As excessive heat will drag the engine to burnt bearings that’s why it’s necessary to get a mercury outboard overheat alarm. The oil temperature gauge is predominantly suitable for diesel that runs warmer than gas engines.
Conclusion
Here in this article, we talked about the essential and facile ways of installing the temperature gauge on the mercury outboard. What do you think after reading all directions on how to install temperature gauge on mercury outboard, is the whole task is too challenging to start over.
Once you will do, we are sure you will be the expert one in this matter. Water drive is always a cheerful thing for water lovers. If you want to continue your trip of water, you should have a thick and thin knowledge of marine engines and all the marine-related technology.
We are hopeful that our attempt to cooperate with you will provide you proper guidance and build new confidence.
- 5 Steps Of How To Reinforce A Transom On An Aluminum Boat
- How To Tie Down UTV In A Toy Hauler- 5 Easy Steps For You!
- How To Build An RV Slide Out 101
- How To Stabilize A Canoe Easily – How Important It Is!
- Learn How To Hang A Canoe On A Fence
- 5 Best Outboard Motor for Canoe With Full Reviews
- 7 Best Cordless Drill for Ice Auger – Which One to Pick?
- Choose The 5 Best Walleye Rod and Reel Combo