Roaming or living through various kinds of space has been improving since early civilization. Living in RV is a unique type of passion for travel-seeking people. And passing the time with an RV slide out, we may get an addition of our entertainment and pleasure when we are on the street.
Who wants to go for Minor travel trailers, RV with slide-outs can become roomy and relaxed. It will give them a great contention, and it would be the most elegant choice for those who are in quest of a homely experience in the travel time.
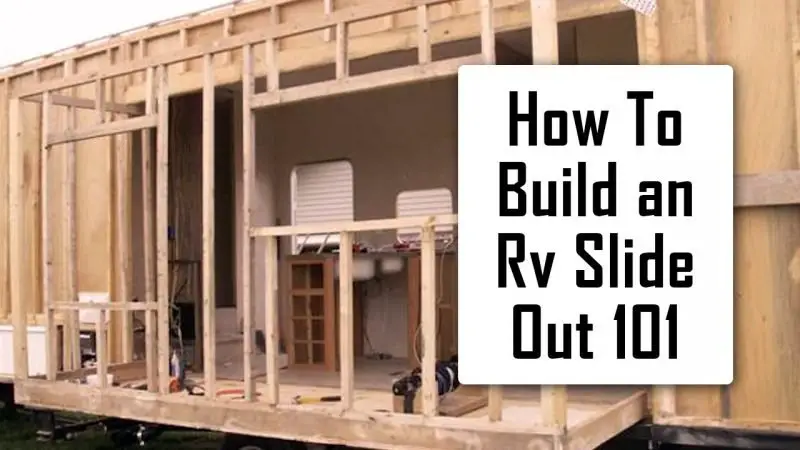
Here, for making your journey comfortable, we will give you the details of how to build an RV slide out 101.
What Is RV Slide-out?
Before learning how to build an RV slide out 101, we may get the knowledge about the RV slide.
Occasionally, a slide-out denoted as a slide room. It meaningfully intensifies the extension of living space in an RV. Several RVs arise with various slide-outs which may switch an RV. It is somewhat parallel to a manor, vehicles on wheels.
It is usually up to 12-feet long and three feet in depth, with four slide-outs. It can efficiently pair the functional track of an RV.
Plan Of The Main Outline Of The Task And Decision On Required Tools
Before going to the main phases, take a glance at how will plan the main task. First, take the idea of seal confirmation of beams and new hoops for reinforcing the form of the vehicle. Then, choose the separation of the slide-out walls and how you will stamp the “joins”.
After that, thermal or airy air will be unable to release, and humidity also unable to pass in. Settle upon numbers of the windows will require the installation process of these, and the way of the sealing.
Decide whether your slide-out will put up unattached furniture only, or the necessity of lighting or power socket. Fix even the tools for travel fixtures, kitchen’s propane line, and waste pipes.
If your slide-out consists of a bed, assure that adequate space remains for it.
How To Build An RV Slide Out 101 By Following Few Secure Means
So, let’s acquire a few secure means of how to build an RV slide out 101:
Step 1: Installation Of Polyurethane Silicone Border
At first, we need to connect a polyurethane silicone border with a rounded sloped end near the opening in the clip where the slide-out may go. It will permit the ground to slide out to keep the rest amplification with the remaining carpeting of the inside.
Step 2: Requirement Of Long Headers For Installing Bundle Blades
Now we require 2×6 yellow long headers. It must be supported by 2×2 maimed hoops that will make the gap nearby the slide. For keeping the frame square-sized, we will install bundle blades.
Step 3: Instruments Will Go Straight To The Battery Box
At this phase of the building of the RV slide put, we want to rack and defender slide-out instruments. It will be driven by a 12 volt DC 30 amp motor. After that, we will wire these entire straight to the battery box.
Step 4: The Building Of Own Devised Circuit
We can build our own designed circuit. It will bring the slide thoroughly with a paired rocker temporary switch. And it also carries two 40 amp relays.
Step 5: Screwing And Gluing For Additional Back-up.
As soon as the electrical part would be finished, go back to the main structure. Here we need to screw A 2 x 4. And it should be glued to the external border of the slide-out for additional backup.
Step 6: The Setting Of The Powerhouse At The Head Of The Sheets
Two laminated sheets of 5/8″ outer plywood make the floor of the slide-out. You get to buy 4 x 8 coats and then may take any good qualities external wood glue for balancing the layer.
For making it more defined, we must set our powerhouse at the head of the sheets. Following these stages will assure us that we make a dense slice of wood which is necessary for this building.
Step 7: Cutting Off The Leading Edge
Then, the last part is cutting off the leading edge. We will cut the top border with a 60-degree slant so the ground will drop in the poly border and slide without a glitch.
When it is finished, you get to stretch the stands of the slide-out to a feasible distance where these could run. Then it is necessary to pare these down for thickness. Everything would be amplified when the slides will be out.
Buying Tips For Building The RV Slide-out
There are many types of rv slide out mechanisms so purchase the motor’s mechanisms furnished with bearing locks.
- Select an energy system which permits smooth modifications.
- You can buy a floor-seated slide form or one seated to the margins.
- If you want to include a bed in your RV, make sure that you have enough space to set this.
- In device selection, you may buy a gearing system or a hydraulic energy assemblage.
Final Word
Making a tour with homely feelings is everyone’s dream and passion. Aren’t all these stages of how to build an RV slide out 101 fantastic and cool!
We believe that our attempt of cooperating with you will add extra splendor to your tiny living place. When you plan for minor traveling, RV slide-out will give you the most relaxed moods than anything else.
And creating the own RV slide out after having RV slide out construction steps will add extra confidence and satisfaction to your journey and tour. Because we have provided you with very simple and easy steps to follow, so you won’t find any additional trouble and pressure while doing the task. So be the proud maker of your RV slide out systems.
- 5 Steps Of How To Reinforce A Transom On An Aluminum Boat
- How To Install Temperature Gauge On Mercury Outboard- A Simple Guideline
- How To Tie Down UTV In A Toy Hauler- 5 Easy Steps For You!
- How To Stabilize A Canoe Easily – How Important It Is!
- Learn How To Hang A Canoe On A Fence
- Get The 7 Best 10×50 Binoculars For Hunting With Cool Budget
- Choose the 5 Best Trolling Motor for Pelican Bass Raider
- Best Paddles for Inflatable Kayak – Top 5 Picks