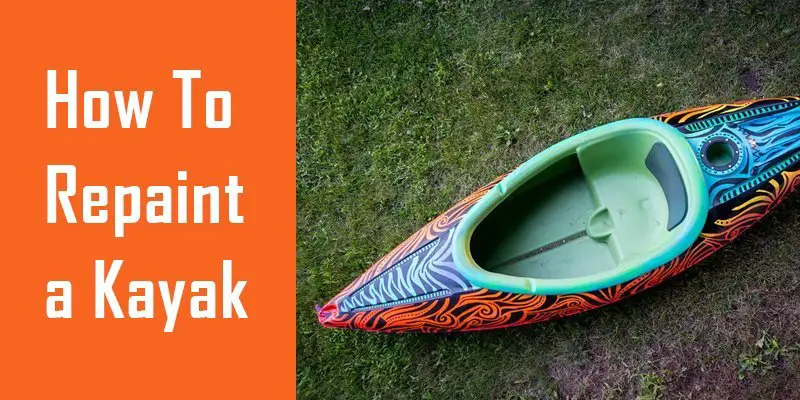
The color of anything is essential. Be it kayak or anything else. It is more interesting to see if the kayak is beautiful in color. Beautiful and brightly colored things attract people.
Many times if you are annoyed to see one color of the kayak or if the kayak is damaged in any way or you buy an old kayak, you can make it more attractive by repainting the kayak.
You can repaint your kayak and decorate it as you wish. You can give a new look to the kayak. But the question is can you paint a kayak?
But you are thinking about how to repaint a kayak body? No worries, we’re going to give you a solution. If you want to custom painting a kayak, you should read this article. In this article, I will discuss it in detail. Let’s get started.
How To Repaint A Kayak With Brush And Spray
Here’s how to repaint a kayak in the right way with a brush and spray. If you follow the method given below, you will find one that is an ideal process for applying paint for kayak.
The method of painting kayak with a brush is the most used. It can paint in a controlled way. This method is readily available with kayak painting ideas.
This way you can give a beautiful finish. But this method is responsible for a little time.
If you want to save time, you can spray paint your kayak. With the help of spray, you can give a beautiful finish. But it is a little challenging to control.
Below is a step-by-step discussion on how to repaint a kayak with a brush and spray.
|
Necessary Materials |
Reason to Buy |
| 1. Paint spray or brush |
Key Features for paint spray:
|
| 2. Marine safe paint |
Key Features:
|
| 3. Water | |
| 4. Clean rag |
Key Features:
|
| 5. Soap | |
| 6. Gloves and glasses |
Key Features for Gloves:
|
| 7. Painting Mask and protective clothes |
Key Features for Painting Mask:
|
The Process Of Work
Step 1: Remove The Parts That No Need To Paint
The first step is to remove the parts of the kayak that do not need to paint. So that when you start kayak painting, the color does not get damaged in those parts.
For example, if the seating area can move, there are some things you do not want to paint.
Step 2: Clean The Kayak
Now the step is to clean the kayak well. Take a clean piece of cloth and rub the kayak well with a little soap.
It should be cleaned in such a way that there is no dirt or dust in the kayak. The kayak should be thoroughly cleaned and dried. Once dry, go to the next step.
Step 3: Apply Paint To The Kayak
The paint should apply with a clean brush or spray. It is better to wear a painting mask and gloves for your protection when using paint.
If you apply one layer of paint first, you have to re-apply the paint in the second step for finishing. You can use a paint roller if you want a better finish.
We recommend that you use both a brush and a roller to get the ideal finish. It may take you a while to apply the paint with the brush.
On the other hand, you need to paint the whole body of the kayak or painting the bottom of a kayak with the help of spray. Kayaks can be easily colored with the help of spray and in less time.
Adding an extra layer of paint to the kayak makes it look much more beautiful.
Step 4: Drying
When the paint kayak is finished, it must be well dried before use. It is not useful until the color of the kayak dries. Of course, it is best to dry in a humid place or sunlight. When dried well, the kayak will not have a sticky filling.
Step 5: Assembly
When the kayak paint dries, the parts of the kayak that were left open before use should place well. Care should take to ensure that the parts fix in their place.
Step 6: Ready To Use
Now that all the steps are over, it’s time to use it. After painting, the kayak looks more beautiful and shiny when it dries well. The kayak needs to monitor regularly to retain its bright feel.
Additional Reminders
There are some things to be careful about when you apply paint to your kayak. For your safety, you should wear glasses, gloves, masks, and protective clothing.
Open space should be selected when painting—a place where light and air can circulate. Painting in a confined space can make it difficult for you to breathe. It does not mean that you should paint in any open space.
Care should be taken not to come in contact with water and air. There is another thing you need to keep a close eye on so that there is no other damage to your paint.
What Kind of Paint Can I Use on a Kayak?
You can use smooth Colours for your Kayak with ultraviolet protection. The smooth color lessens the effect of the sun. The color of the UV product is essential for your outdoors. You can use non- UV products indoors.
Final Verdict
This article discusses how to repaint a kayak. The painted kayaks look attractive.
You can give your kayak a new look by repainting when you have a used or damaged kayak. You can decorate your kayak to your liking with your desired paint.
We advise you to paint with both brush and spray. If you paint the two together, you will get the ideal finish. Which will make you feel more excited. It will make your kayak look more shiny and bright.
Your journey is colorful if the paint of the kayak is attractive. Color acts as an essential regulator. Repaint can bring life back to an old thing. Before repainting you can check how to paint a kayak as well. So the importance of paint, in any case, is immense.
- How To Feed Wire Through Trailer Frame With Easy Way
- How To Get Rid Of Wasps In Rv – Easy And Amazing Tricks
- How To Adjust Air Brakes On Motorhome Bus
- How To Gelcoat A Kevlar Canoe – A Complete Guideline With 8 steps
- How To Choose Right Kayak Paddle
- Get The 7 Best Canoe For Family Of 4
- Best Paddles for Inflatable Kayak – Top 5 Picks
- 5 Best Outboard Motor for Canoe With Full Reviews